Repackage Adobe Air-based Apps for OS X

A seemingly grey area when doing a Google search, is how to repackage apps created with Adobe Air for OS X deployment. It's really simple to deploy these apps if you know your target audience have Adobe Air's runtime already installed, but what if they don't? How do you distribute Air along with the app itself and package it in a standard .pkg file? To get started, you'll need a few tools for the job. I've provided links to grab the tools I use. Adobe requires you to apply for distribution before you can get their "enterprise runtime", quite an annoying move on their part, but lets just go with that. (UPDATE: You can use the normal Air installer for OS X that you get from http://get.adobe.com/air, but you're not suppose to, due to licensing.) (UPDATE #2: Adobe Air Runtime Guide)

Prepare the Project folder

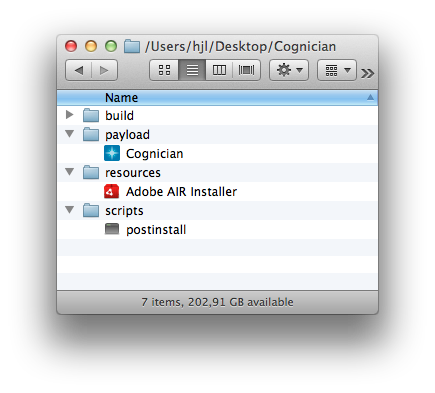
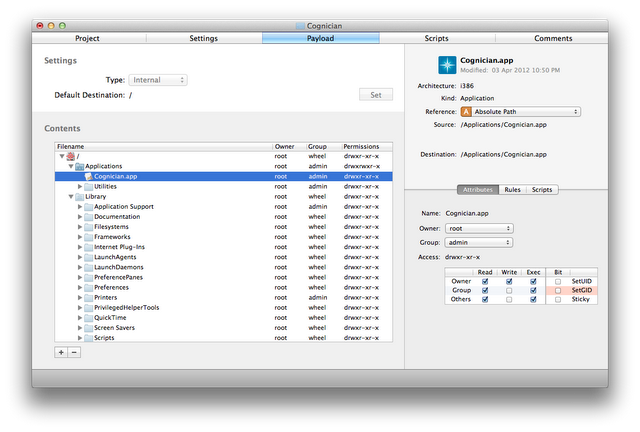
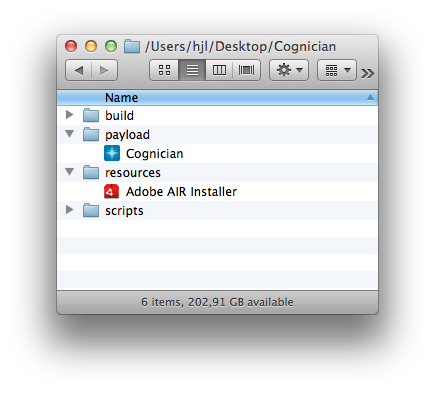
You don't have to follow my example to the letter, but its good to find and stick to a structured way for project folders when building your packages. I simply created a folder Cognician on my desktop with a few subfolders and then populated the payload and resources folders.

Create the Script

Open Terminal.app and type the following commands:

  • Create the file: touch ~/Desktop/Cognician/scripts/postinstall.sh
  • Make it executable: chmod +x ~/Desktop/Cognician/scripts/postinstall.sh
  • Edit it: nano ~/Desktop/Cognician/scripts/postinstall.sh
  • Add the following lines to the script:

#!/bin/sh

# Execute Adobe AIR Installer "Adobe AIR Installer.app/Contents/MacOS/Adobe Air Installer" -silent -eulaAccepted

  • Save the script by pressing ctrl + x, then press y and hit enter
Your project folder will now look like this:
Build the Package
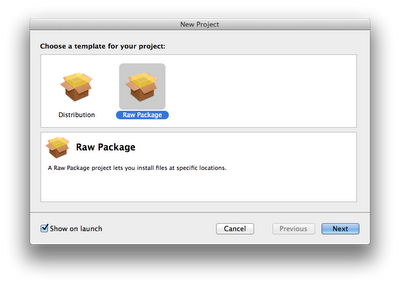
1. Launch Packages and choose Raw Package. Click Next.
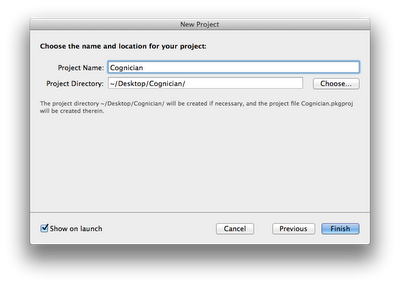
2. Add a name and set your project folder/directory. Click Finish.
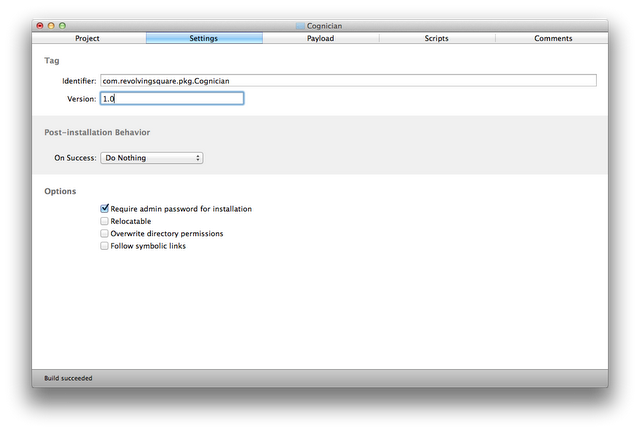
3. Go straight to Settings and set the Identifier. As is customary, the identifier is written in reverse DNS notation.
4. Add your payload by clicking the + at the bottom and locating your Air app. Place it in /Applications
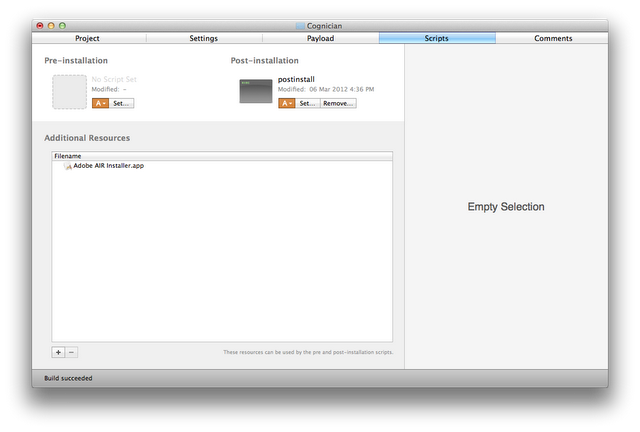
5. Scripts, add the Adobe Air Installer.app in Additional Resources. Also add your postinstall.sh script.

6. Press Cmd + B to build the package.All done, you'll find the package in the 'build' folder. Now just test your package and if all is well. You're good to deploy it!

Notes: To verify that the Adobe Air installer works you can tail -f /var/log/system.log | grep "Adobe Air" while installing the package. Look for output like this...

Runtime Installer begin with version 3.1.0.4880 on Mac OS 10.7.3 x86 Commandline is: -silent -eulaAccepted No installed runtime detected Launching subprocess with commandline /bin/chmod -fRP +rw "/Users/Shared/Library/Application Support/Adobe" Launching subprocess with commandline /usr/sbin/chown -hfRP root "/var/root/Library/Application Support/Adobe" Launching subprocess with commandline /bin/chmod -fRP +rw "/var/root/Library/Application Support/Adobe" Starting silent runtime install. Installing runtime version 3.1.0.4880 Registering /Applications/Utilities/Adobe AIR Application Installer.app/Contents/Info.plist Launching subprocess with commandline /usr/sbin/chown -hfRP root:wheel "/Library/Frameworks/Adobe AIR.framework" Subprocess chown succeeded Launching subprocess with commandline /usr/sbin/chown -hfRP root:wheel "/Applications/Utilities/Adobe AIR Application Installer.app" Subprocess chown succeeded Launching subprocess with commandline /usr/sbin/chown -hfRP root:wheel "/Applications/Utilities/Adobe AIR Uninstaller.app" Subprocess chown succeeded Runtime Installer end with exit code 0

ActiveSync Autodiscover URL

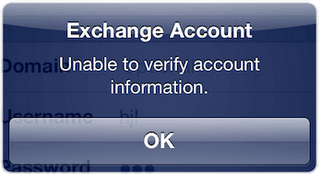
A peculiar situation... an iPhone refused to setup an exchange account and every time you try an error comes up: Unable not verify account information. It turned out to be a simple typo, but not by the user! A typo that could easily be overlooked given the tools we generally troubleshoot with. Here's how things panned out...

After entering in the user credentials in an exchange account setup, it successfully discovers the mail server, so autodiscover is working right. Click next, and the error pops up. Next step, can we access the mail server via Safari? Yes, so at least we know it can connect to the server in question.

As I don't have access to the exchange server configuration to verify settings from the server's side, I had to troubleshoot it from the end-user side only.

First off... packet tracing on an iPhone. { Technical Q&A QA1176 for detailed instructions }

You'll need Xcode 4.2 or later installed and an iOS 5.x device with its USB cable.

  • Check your existing network interfaces by running ifconfig -l in Terminal.
  • Get your device identifier by connecting the iOS device with USB, run Xcode and click on Window > Organiser then select the device. Look for the identifier value.
  • Next type this command rvictl -s your-identifier-here
  • If you run ifconfig -l again, you'll notice a new interface rvi0
  • Then do sudo tcpdump -i rvi0 -s0 -w ~/Desktop/trace.pcap
  • Perform the failing exchange account setup on the device, once done stop the tcpdump by pressing ctrl+c in terminal

Using WireShark I opened up trace.pcap to analyse. The packet trace revealed that the device connects using SSL/TLS and then proceeds on to normal un-secure http traffic. Something it's not meant to do. The username/password was also sent in cleartext as a result of the un-secure communication.

Next port of call was Microsoft's tool www.testexchangeconnectivity.com with which I used the same credentials, only to find that I get green tick marks all over the place. Usually a good result!

I attempted the setup on another iOS device, however that resulted in the same error.

Going back to Microsoft's tool, I checked out the results thoroughly and found something that could very easily be overlooked, something Microsoft's tool won't even point out as a potential problem!

Autodiscover's whole point is to return a mail server to the device based on your smtp domain, in other words whatever is after the @ sign in your email address. In the iOS interface we only see that mail server as mail.pretendco.com. However, what autodiscover actually returns is a full URL such as http://mail.pretendco.com/Microsoft-Server-ActiveSync ....wait that's not right... yes... there's that typo!!! It should be https://mail.pretendco.com/Microsoft-Server-ActiveSync

What happens on iOS is that the returned URL from autodiscover also determines whether or not your iOS device will communicate using a secure connection. If that URL shows http://, it will go ahead in an un-secure fashion resulting in the error. To fix it, the exchange admins had to simply correct http to https and all was well again.

Bottom line: while Microsoft's exchange connectivity tool is really great to test/troubleshoot with, don't always just blindly trust those green tick marks.

Thoroughly check those autodiscover URLs!

Notes: This article is based on the assumption that the exchange mail server utilise secure communication and does not allow un-secure connections. Allowing un-secure connections to your exchange services is bad practice.

Creating an un-configured OS X Lion Server VM

I wanted to set up a virtual machine that starts up just like that freshly unboxed Mac Mini server, with server assistant and all. Not for any particular reason,  just for the ease of use and fun of it.

As it were, VMware Fusion 4 removed some potentially handy tools for such a job, like mounting a vmdk, but without going into those details and getting vmdk's to mount... there happens to be a rather simple way to get this done!

First lets take a look at what you need for creating an un-configured Lion Server image.

1. OS X Lion Server and the "Install Mac OS X Lion.app" in your /Applications folder. 2. An empty partition/disk called Server HD (can be memory stick or external disk). 3. Active internet connection

Run the Lion Installer and click customise, make sure Server Software is selected, then start the installation. It will initially download the Server Essentials package from Apple, then prep the targeted disk, you'll then have to restart in order for the install to continue. The setup will continue and on the second restart, hold down option/alt and boot back into your original Lion Server.

Now use Disk Utility to create an image of the un-configured Lion Server install. Make sure you scan this image for restore. Once done, copy that image to your VMware Fusion4 host.

{ See HT4746 for more info - Lion Server: Mass Deployment Strategies }

Setting up the Virtual Machine

Fire up VMware Fusion and create a new VM, choose Continue without disc and then Choose a disk or disc image and point to your "Install Mac OS X Lion.app". Proceed through the dialogs and click Customize Settings and save your VM.

Next configure a few settings, specifically Processors & Memory, set to minimum 2 processor cores (credit to @arekdreyer and @andrina). This is really important. If you don't set this, you can't create an Open Directory master/replica, it will just hang and go no-where.

Next add another CD/DVD device, do not mount an image for it yet.

Start your VM up and wait for it to load Lion's setup, now attach the un-configured Lion Server image to the second CD/DVD device you added, then open up a terminal window.

Run 'diskutil list' to get a view of the disks present. At the top of the list will be /dev/disk0 with a volume "Macintosh HD". Locate your un-configured OS X Lion Server image. If you followed everything so far, it should be at /dev/disk14. This step here is only necessary to verify the volume names that you'll specify for the next step.

We'll use Apple System Restore to dump our un-configured image to the VM's hard disk. $ asr restore --source /Volumes/Server\ HD/ --target /Volumes/Macintosh\ HD/ --erase You'll be prompted to erase, press y

Once the restore is done, shutdown the VM completely, disconnect the CD/DVD devices, and guess what you're done! Booting up the VM now will result in a brand new Mac Mini server-like setup experience.